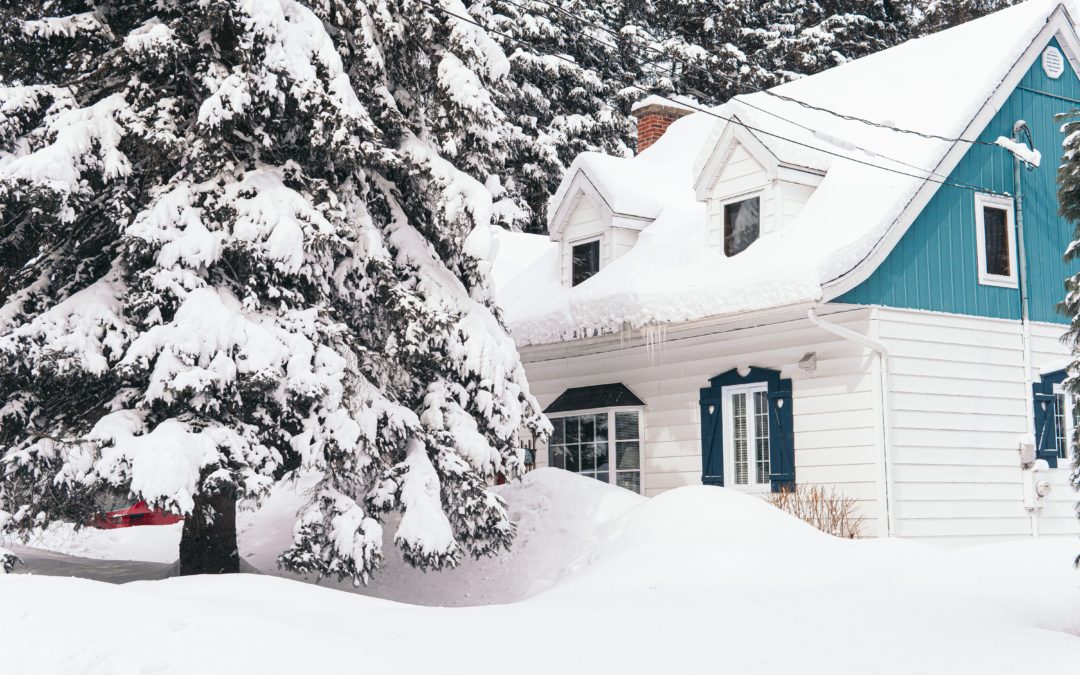
by Werner-Admin | Nov 20, 2020 | Roof Maintenance
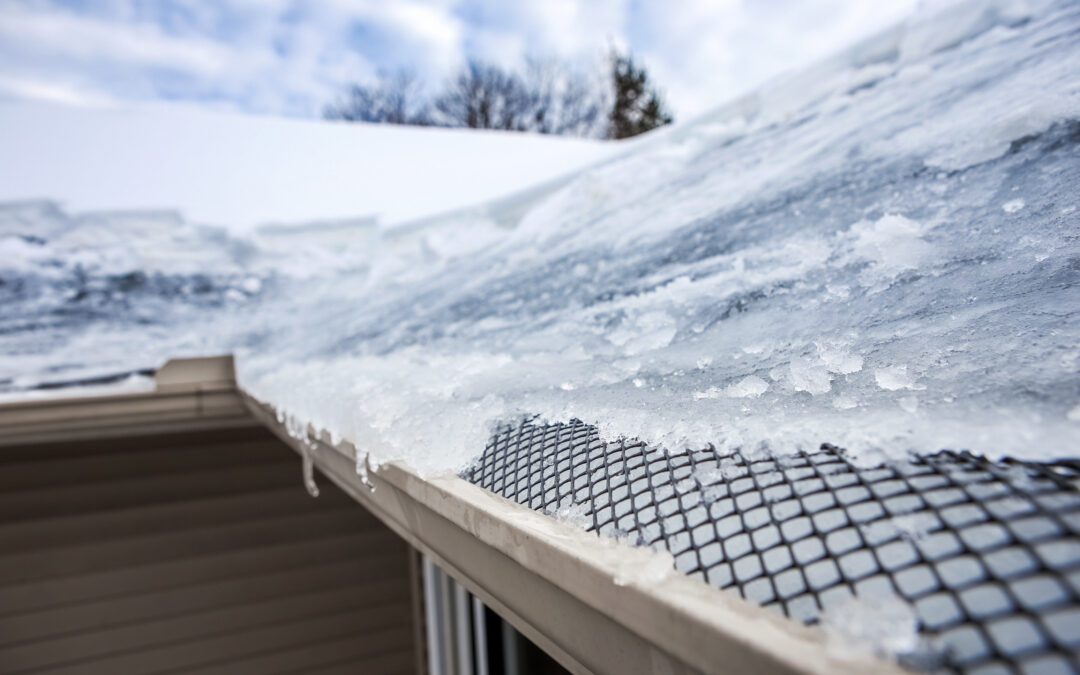
While ice dams may appear to be an innocent product of winter weather, they can cause severe damage and seriously threaten your roof’s integrity. Let’s look at what ice dams are, how ice they form, and what you can do to get rid of them — or prevent them from forming in the first place.
What are Ice Dams?
Ice dams are ridges of solid ice that form on your roof’s eaves. They are caused by a difference in temperature between the underside of your roof and the roof’s surface during the colder, more snowy months of the year. Sometimes ice dams also form in gutters, stopping water and snow from moving safely off your home’s roof and instead directing it into your home. Roofs with low slopes are most susceptible to the formation of ice dams, although they can form on almost any type of roof if conditions are right.
Ice dams can be difficult to spot if you don’t know what to look for. Understanding how they form can help you identify areas you might find ice dams on your home’s roof.
Now that you know what ice dams are, let’s get into the cause and solution.
What Causes Ice Dams?
Ice dams form similar to icicles — from the movement of water that later turns to ice on your roof. However, ice dams have far more severe consequences for your roof and home. Here’s how ice dams form:
- Warm air underneath the roof melts snow on shingles.
- Water moves down the roof, melting more snow as it goes.
- Water passes down the roof slope until it reaches the eaves.
- Cool air under the roof’s eaves causes the water to refreeze.
- Layers of ice begin to build up on the eaves of the roof.
- Water with nowhere to go seeps underneath your shingles and can develop leaks or start rotting the wood of your roof.
When left unaddressed, water can seep through your roof and into your home, where it can cause severe damage. Even if you don’t notice a visible leak, moisture under the roof deck attracts mold and mildew, which may further damage and compromise your roof. If your roof has ice dams, it’s best to remove them quickly before more damage occurs.
Now that you know what causes ice dams, let’s look at what your course of action should be and how you can prevent ice dams in the future.
How to Remove Ice Dams
Let’s talk about what to do to remove ice dams by first talking about what not to do: never attempt to peel, hack, chip, or scrape ice dams directly off your roof. This method is sure to cause more harm than good. You’re more likely to break shingles or remove them altogether — which will let pooling water damage your roof and home that much faster.
If you need to deal with ice dams on your roof right now, let’s look at two approaches:
1. Cool the Underside of Your Roof
Use a fan (or multiple fans) in your attic and direct it towards the roof. The goal is to cool the underside of the roof so snow won’t melt and flow down your roof, where it can refreeze into ice dams. The downside of this method is that it isn’t effective at removing existing ice dams, but it can help reduce further damage until you can have the problem addressed by a professional.
2. Use a Chemical Deicing Agent
Use calcium chloride to melt ice dams. Never use rock salt, as it will damage your shingles and roof. Position the chemical vertically on your roof and perpendicular to the ice dams to break them up and create a path for water and snow to travel off your roof. You can hold the deicer in place by using a pair of sheer stockings. Fill the stockings with the chemical, then drape it on your roof’s eaves. The solution is simple, effective, and a good use for that extra pair of stocking you likely have lying around.
3. Ask a Professional
Call a professional if you have ice dams on your roof and can’t safely remove them. An experienced roofer will have the tools and expertise to deal with ice dams safely and effectively and can help talk through your options for preventing them in the future.
How to Prevent Ice Dams
If you want to save your roof from the dangers of ice dams, here are a few methods you can use to prevent them in the future.
1. Remove Snow From Your Roof
To prevent ice dams, you can remove snow before it melts and refreezes into ice by carefully raking it off your roof. This method is labor-intensive, and if you’re not careful, you could cause damage to your shingles by scraping or pulling them off. It’s best to have this done by someone with experience — or find a more permanent solution.
Alternatively, you can use heated cables to melt the snow before it can freeze into ice dams. Arrange heated cables in a zigzag pattern along the eaves of your roof and attach them with clips. Cable lines are effective at keeping ice dams from forming but are a temporary solution at best. They don’t go after the root cause of ice dams.
2. Insulate Your Roof
Adding insulation layers to your attic floor can prevent ice dams from forming. This traps heat in the living areas where it belongs and keeps it away from your roof, where it could melt snow and lead to ice dams. A professional roofer can assess your home’s level of insulation and see where vulnerable areas could use more protection.
3. Ventilate Your Roof
Adding proper ventilation to the roof, particularly under the ridge and eaves, can help prevent ice dams. Extra ventilation circulates cooler air to the underside of the roof, preventing any snow on your roof from melting and ice dams from occurring and building up in the same places every year.
A combination of insulation and ventilation is recommended to effectively prevent ice dams. Contact your local roofer to help assess what your roof needs.
When to Replace Your Roof Due to Ice Damage
Whether your roof is due to be replaced soon anyway, or you’re tired of dealing with ice dams and damage every winter, you may consider replacing your roof with one that is not susceptible to the formation of ice dams — like a standing seam metal roof.
Standing seam metal roofs don’t provide traction for ice dams to form, so water, snow, and ice are all able to drain off and away from your roof easily. Although ice dams can still form on low-sloping metal roofs that don’t have proper insulation and ventilation, it’s very rare.
The best defense against ice is to outfit your home with the best system to limit the time that snow sits on your roof and to prevent melting and refreezing. If you’re worried about ice dams on your roof this winter, talk to the Werner Roofing team. We’re ice dam experts, and we’re happy to come out, take a look at your roof, and offer a few suggestions or help you get rid of ice dams on your roof.
by Werner-Admin | Nov 17, 2020 | West Michigan Roofing Blog
Are you wondering if installing a roof during the winter is a good idea? You might be interested to know that many roofing companies will flat-out refuse to install a roof in the winter months. The question is: why? Let’s dive in.
Can I Install a Roof in the Winter?
During the winter months, cold temperatures are only one part of why winter roof installations are not recommended. Conditions on a roof can get icy fast, materials don’t adhere the way they should, and the roof installation process leaves sensitive parts of your home exposed to the elements. All of these factors risk the integrity of your roof, the safety of the roofing installation crew, and your investment in the project.
For these reasons, if you want a winter roof installation, your roofer will strongly recommend you do it in the fall before the temperature drops or push it back until the spring or summer. These seasons are typically referred to as “roofing seasons.”
In some unique circumstances, things happen, and the bottom line is that you need your roof installed during the winter. Maybe a tree fell and damaged your roof, you need a new roof installed before you can sell your home, or you need to replace your roof before the end of the year to meet insurance requirements. If you have a situation where installing a roof in the winter is unavoidable, the process comes with risks the homeowner must understand before work begins.
What Are the Risks of Installing a Roof in the Winter?
There are many reasons why some roofers prefer to avoid installing a roof in the winter. Not only does winter roof installation present many safety risks for the crew, but they also can’t guarantee the same high-quality level of installation that they can during warmer weather.
Let’s take a closer look at the main risk factors associated with winter roof installation.
Unsafe Work Conditions
During the cold months, the conditions on your roof can turn slick quickly, creating an unsafe environment where workers could slip and fall and hurt themselves or damage your roof.
The winter elements are challenging to work in, and roofing contractors need to be able to move freely, bending down and working across your roof — which is difficult to do in cold weather and thick winter clothes. If they have to carry equipment while wearing heavy coats and boots to keep warm, it takes more time and energy to do a job they’re used to doing quickly in nice weather.
To continue, it’s challenging for anyone to stay motivated when they’re cold and uncomfortable. With winter roof installation, you risk workers rushing to complete the job if the temperature is freezing. Whether it’s because they’re wearing thick gloves and don’t have the same feel for the materials, or the limited amount of daylight is running out, and they need to meet a deadline, you don’t want your roofing crew to miss any crucial steps when installing this critical part of your home.
Ineffective Materials and Tools
Cold temperatures affect the quality of the materials and the effectiveness of tools used for winter roof installation. Roofing equipment and tools, including nail guns and compressors, are affected by low air pressure, resulting in imperfections in the roofing installation process.
Are you investing in a new asphalt roof? Asphalt shingles are less flexible in the cold and could become brittle, difficult to cut straight, and more likely to be overdriven by nails when attached to your roof. They also involve a glue strip designed to self-seal when it’s activated by the sun’s heat. This activation process doesn’t occur in lower temperatures, so the shingles may not adhere properly, or they’ll need to be sealed by hand, which is hard to do consistently with every shingle in freezing temperatures – even for experts.
Warranty Exemptions
A hasty winter roof installation could lead to product failures and problems in the future, which your roof warranty may not cover. For example, if your shingles have to be hand-sealed because it’s too cold for the self-seal to adhere correctly, a variety of defects and issues could occur, including leaks forming or loss of shingles.
Since the fault occurred from attempting to install the roof in the winter, not as a fault of the manufacturing process, these defects aren’t typically covered by the manufacturer’s warranty.
Exposed Home
Winter roof installation jobs generally take longer than summer installations. The combination of colder temperatures, heavy winter clothing, and extra sealing work makes it more difficult for the crew to work as quickly as they usually would. Also, the days are shorter during the winter, so only so much can be done when there is good light.
A longer timeline for a roof installation means your home spends more time exposed to the elements during a time of year when heavy rain or snowfall can happen without much warning — particularly in areas where lake-effect snow is common. Do everything you can to protect your home and install a new roof during ideal weather conditions.
Werner Roofing Is Here To Help
Having a new roof installed in the winter isn’t a great idea. Instead, try to schedule your roof installation before or after winter and call the Werner Roofing team this spring, summer, or fall!
by Werner-Admin | Nov 6, 2020 | Uncategorized
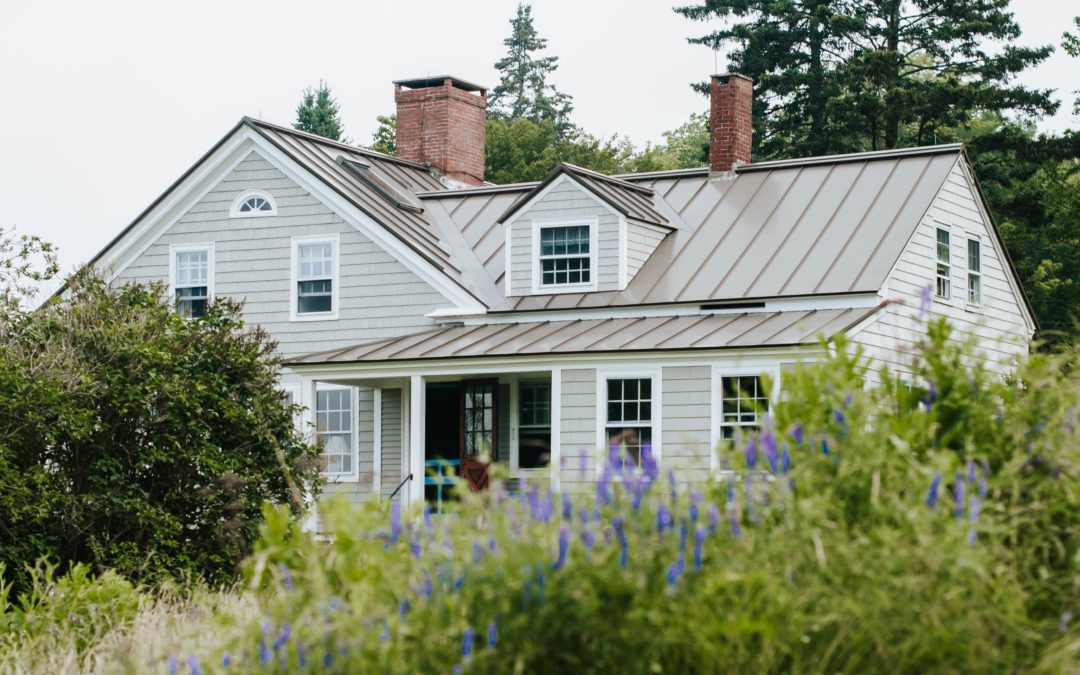
Standing seam metal roofs are one of the most high quality roofing systems you can choose for your home. Metal roofs are known for offering superior protection and durability, all tied together in a sustainable and cost effective package. What’s a standing seam metal roof, and how could it benefit your home? Let’s talk about this popular roofing system and a few of the advantages it offers.
What is a Standing Seam Metal Roof?
A standing seam metal roof consists of a flat metal panel running from the ridge of the roof to the eaves that are connected to other panels with secure fasteners. The standing seam — typically one or two inches above the panel — is what conceals the fasteners. The standing seam protects the connection between the panels from weather better than a traditional metal roof. It also facilitates water runoff and thermal movement, and reduces debris buildup, including sticks, leaves, and snow.
Benefits of a Standing Seam Metal Roof
A standing seam metal roof is a durable weatherproof shield that protects your home against wind, rain, hail, and other weather events. There are many benefits of a metal roof for your home, but a few of the most notable are sustainability, easy maintenance, durability, and overall value.
Sustainability
Standing seam metal roofs are one of the most sustainable roofing choices on the market. They can be made from up to 95% post-consumer recycled aluminum, and when your roof eventually needs to be replaced, the materials can be completely recycled.
Metal roofs are also more energy-efficient than asphalt shingles or other roof types. They keep your home cooler during the summer by reflecting the sun’s heat away from your home. Asphalt roofs, on the other hand, absorb heat year-round, which insulates your home during the winter, but makes your air conditioning work harder to cool your home when it’s warm out.
Simple Maintenance
Metal roofs are much easier to maintain than traditional asphalt roofs. The roofing panel design collects less dirt and debris than traditional roofs. When they do need cleaning the dirt can easily be removed with soap and water. If you don’t want to clean your metal roof yourself, you can have it done by a professional, so you can avoid injury and possible damage to your roof.
Extreme Durability
Metal roofs are known for their superior protective capabilities and durability. They can last up to 70 years before they need replacing, compared to the maximum 20 years of an asphalt shingle roof. They also offer greater wind and impact resistance than traditional roof types, so you don’t have to worry about repairing damage or replacing shingles every time the wind picks up. Even if a tree branch falls on your metal roof it’s unlikely to cause serious damage like cracks or holes — at most a dent may appear, but the damage will only be cosmetic. Your roof’s integrity will be preserved and it will continue to protect your home and your family.
Lifetime Value
Standing seam metal roofs are also becoming more popular with homeowners because of the rising cost of oil, which causes a similar rise in the price of asphalt shingles. Homeowners are comparing the costs of the materials, labor, and maintenance of roofing options and seeing the true value of a metal roof for their home.
Metal roofs last longer than asphalt shingle roofs, and therefore have a greater lifetime value. A durable standing seam metal roof increases your home’s value and costs less to maintain than traditional shingle roofs. Although it requires a larger initial investment, the payoff of a standing seam metal roof comes from the overall value of the roof and the superior protection it can offer your home.
Customizing Your Standing Seam Metal Roof
A standing seam metal roof offers a unique roofing option. With a metal roof, your home is likely to stand out from others in your neighborhood, and can customize the shade to complement your home’s design. If you’re not sure which color to choose, try out different options using an online visualizer tool or talk to a metal roof expert. Whatever color you choose, a standing seam metal roof will serve you well — both aesthetically and practically — and it will continue to protect your home and your property value over time.
Is a standing seam roof right for you? Let us know! If you’re interested in installing a standing seam metal roof on your home, the Werner Roofing team can certainly help.

by Werner-Admin | Oct 23, 2020 | Uncategorized
What all goes into that final price you see for your roof repair. How much insurance pays in, how much you’re paying for labor, how much you’re paying for materials and time, etc. Remember that it’s always cheaper to have a roof repaired sooner rather than later.
If your roof has sustained damage or has a leak, it’s important to get it checked by a professional as soon as possible. Small leaks or weaknesses in your roof can quickly become large problems if water gets in or a storm damages your roof. If left unaddressed, the cost of roof repair can skyrocket and may not be covered by your roof’s warranty or insurance. Repairing your roof early can help prevent this from happening, and it can also lower the cost of your roof repair.
Cost of Roof Repair Breakdown
When you see the cost of roof repair, it generally includes both the roofing supplies and the labor and time it takes to complete the job. Let’s breakdown these elements and see how much it affects your total.
Supplies Cost of Roof Repair
When you get your roof fixed after a storm or to address regular wear, a large part of the cost of roof repair is the price of the materials used to fix your roof. This not only includes the visible elements you see, such as shingles or tiles, but also the accessories used to waterproof and protect your roof deck, cover ridges and vents, and other roof details. The materials themselves vary in cost, and the amount you spend on each will depend on the amount of damage and the area that needs to be replaced. Here are a few average costs for common roofing materials:
- Asphalt Shingles: $5-10 per square foot; The least expensive shingles are 3-tab, while architectural and dimensional shingles will cost more to repair. Asphalt shingle prices vary as the price of oil used to make them fluctuates.
- Cedar or Wood Shingles: more expensive than asphalt shingles, but the cost will depend on the kind of wood, the availability of the materials in your area, and the specialized installation needed to attach them.
- Metal Roofs: $5-15 per square foot; Metal roofs are typically more durable than asphalt or wood shingles, and occasional damage such as repairing seams or dents is generally cosmetic only and will not damage the integrity of your roof.
Labor Cost of Roof Repair
Hourly labor factors into the cost of roof repair, and can vary depending on the typical hourly rates for contractors in your area, the extent of the damage to your roof, the number of workers required to repair your roof, and the amount of time it takes to repair your roof. The national average pay for a roofer is $75 per hour, but depending on where you live this can range between $25-$100 an hour.
Estimating Insurance for the Cost of Roof Repair
If your roof was damaged and you make a claim to your insurance company, you may be reimbursed for part or all of the cost of roof repair. However, the insurance coverage will vary from roof to roof, depending on several factors such as your roof’s age and size and the extent of the damage. Your roof’s warranty may help cover areas your insurance won’t. Let’s break this down a bit further.
Age of Roof
It’s possible the age of your roof will determine what your insurance policy will reimburse you for the cost of roof repair and what repairs can be covered. Depreciating values of your roof can impact the reimbursement level. Most policies cover events of natural disasters and weather, vandalism, and fire damage. However, long term leaks are typically not covered, so regularly check your roof for damage and address problems right away. Regular roof wear and weathering can decrease your roof’s ability to protect your home over time, but is also not covered by most insurance plans.
Size of Roof
The size, pitch, and complexity of your roof’s design can affect the cost of roof repair. If your insurance offers a flat rate of reimbursement to cover roof repairs, your roof may not be fully covered if it needs special accommodations or materials to repair it properly. A complex roof design with dormers, valleys, and a steeper pitch will require more labor and materials than a straightforward roof design, and therefore will be more expensive to repair.
Roof Warranty
The reason your roof needs repair is going to determine how your costs are covered, either by your insurance or your roof’s warranty. Insurance will cover events of extreme weather, fire, or vandalism, while generally, manufacturing defects or poor installation are not included in insurance plans. Roofing warranties typically only cover defects from the manufacturer that cause the roof to break down sooner than it should, and usually last about 20-50 years.
Most problems with roofs cannot be traced back to materials, but instead to something that went wrong during the installation. This is why it’s so important to hire a reputable roofing contractor to install and make repairs on your roof. Workmanship warranties are rare, but they can protect you and your roof from problems that arise from improper installation.
Extent of Roof Damage
Your insurance adjuster determines the cause and extent of damage to your roof, and whether it falls under your warranty or your insurance policy. If the cause is determined to be a natural one, the insurance coverage should be proportional to the extent of the damage. If only cosmetic damage is reported by the adjuster, your claim could be denied. As long as damage doesn’t affect the integrity of the roof, the insurance company can have the final say on this subjective criteria.
Ultimately, the best practice is to file a claim with your insurance company and have any problems with your roof resolved as soon as possible. This will ensure that your home continues to be protected by a high-performance roof, and you’ll save money on the cost of roof repair by not letting any damages get worse and more expensive.
Does your roof need a bit of repair? Get in touch with the team at Werner Roofing. We’re happy to offer you a free, no-obligation estimate, so you know exactly how much you’ll have to spend before we even start working.
by Werner-Admin | Oct 16, 2020 | Uncategorized
The way roofs are measured and roofing materials are calculated is not always simple. When trying to estimate the amount of shingles or other roofing supplies, you may have found that your calculations don’t match up with the way roofing companies or suppliers talk about their products. Instead, they may refer to roofing supplies in terms of roofing squares. What is a roofing square and how can we use it to calculate the roofing materials you’ll need? Let’s find out.
What is a Roofing Square?
The term roofing square does not refer to square feet or yards. In fact, it is a unit used to express 100 square feet, in order to simplify the grouping and ordering of roofing materials such as shingles, tiles, or other supplies. Roofing squares are commonly used to calculate the materials needed for roofing projects, so you may hear your roofing contractor or your materials supplier refer to your roof in these terms.
For help calculating the total roofing squares in your home’s roof, some manufacturers offer free roofing square calculators online, or you can have your roof assessed and receive a free quote from a professional roofing company. Or, you can DIY by measuring your roof yourself.
Measuring Roofing Squares
If you need to measure the amount of roofing squares your roof contains, you can do this simply by measuring the total square footage of your roof, and then using that amount to calculate the number of roofing squares it contains. Let’s go over 4 steps to do this safely and effectively.
#1 Prepare
First, make sure you have all the right equipment to get onto your roof and measure it safely. This will include a tape measure, a small notebook and pencil, a sturdy ladder, and a buddy to hold the ladder still and supervise while you’re on your roof. Tread carefully on your roof so you don’t slip or cause damage to your roof.
#2 Measure
To find the square footage of your roof, measure the length and width of each plane of your roof, including the sides of all dormers, into valleys, and all other roof design details that are covered with roofing materials. Find the area of each plane by multiplying the length and width.
#3 Calculate
Add all the area totals together to get the total square footage of your roof.
#4 Convert
To find the number of roofing squares your roof contains, convert the square footage to roofing squares by dividing number you found in Step #3 by 100. For example, if the total square footage of your roof was 1700 square feet, your roof contains 17 roofing squares.
Keep in mind that roofing squares is not the only information you need when estimating the required materials for completing a roof replacement or installation. Roofing pitch also factors into the total amount and cost of materials for your roofing job. The higher the pitch of your roof, the extra materials you’ll need to cover your roof effectively. Also, if your roof has many complicated details like dormers and valleys, it will need more specialized materials to make sure these sensitive areas are reinforced against leaks or damage.
Measuring Roof Pitch
Roofing pitch is described in degrees, relative to a right angle. To calculate your roof pitch, you need to know the rise and the run of your roof.
- The rise refers to the height of your roof, from the top of the wall to the peak of your roof where the planes meet.
- The run is the distance between the roof plate and the point directly underneath the center ridge or roof peak
Once you’ve measured these two elements, you’re ready to calculate your roof pitch.
Finding Roof Slope
We find the roof slope by plugging the rise and the run into the pythagorean theorem, where the slope of your roof, or the rafter length (squared) = the rise (squared) + the run (squared).
For example if the rise of your roof is 6 feet, and the run of your roof is 12 feet, then:
(6×6) + (12×12) = the square root of 180, or about 13.42
This completes our triangle, so we know the length of all sides.
Calculating Roof Pitch
You can find the pitch of your roof by dividing the rise by the run. Using our example that would be 0.5 or 50 percent. If you want to express this percent as an angle, you’ll need to plug the percentage into this equation using a scientific calculator or an online tool:
Pitch angle = arctan(or tan-1) x (pitch percentage)
Using our example: arctan (0.5) = 26.57 degrees
Now that you know how to measure your roof, calculate a roofing square, and find your roof’s slope and pitch, you should have all the information you need to order materials for your roof! It’s always a good idea to check your calculations with a professional roofer and make sure all materials are installed correctly to give your roof the best, longest-lasting protection.
Looking for a bit more roofing information? Whether you’d just like a bit more help figuring out how many roofing squares are in your roof, or you’re interested in a brand new roof, the experts at Werner Roofing would love to help. Give us a call or reach out to our team online with any and all roofing questions.