How to Repair Hail Roof Damage

How to Repair Hail Roof Damage

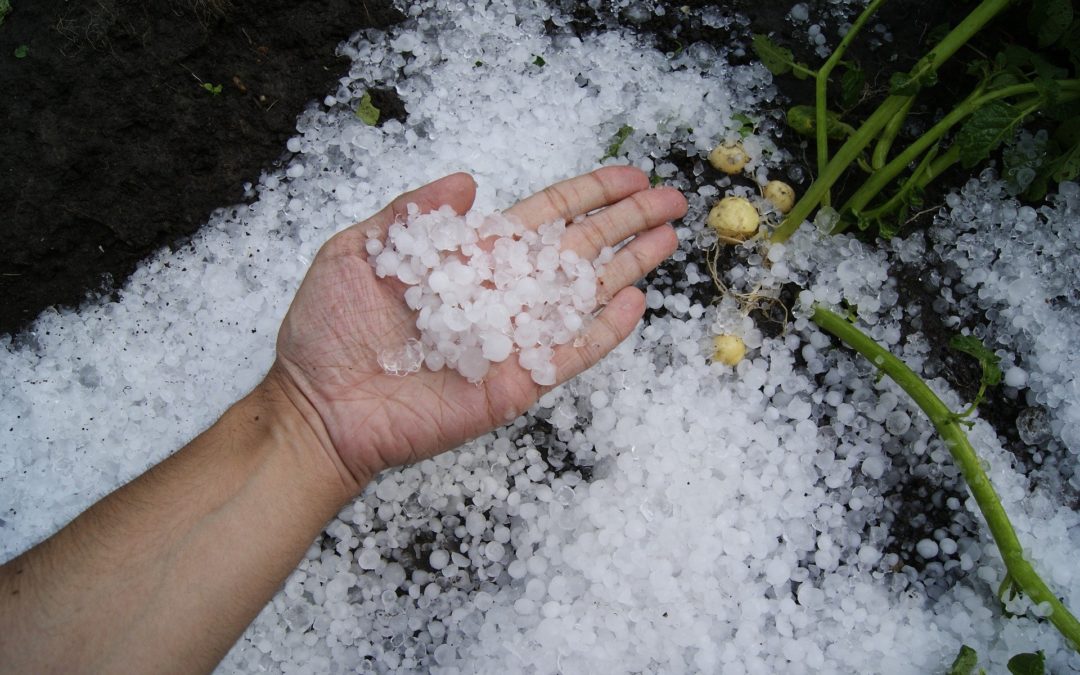
Storms are not exactly a roof’s best friend, especially if Mother Nature’s fury includes hail! After all, we’re talking about chunks of jagged, frozen ice that can be as big as grapefruits, for Pete’s sake! Though the bigger the hailstone the more likely it will cause damage, the truth is hail of any size can result in costly roof problems. That’s why it’s important to know how to spot hail roof damage, and even more importantly, what you can do about it.

Determining if You Have Hail Roof Damage

Along with the size of the hailstones and the direction and speed of the wind, the age, materials, slope, and condition of your roof can all play a part in the amount of hail roof damage you experience. However, no matter the weather and roof conditions involved, it’s always a good idea to check for signs of damage post-storm. Here’s how:

Look Around at Ground Level

You don’t necessarily need to break out the ladder right away to determine if you have roof damage after a hail storm. Sometimes, a simple walk around your house can reveal enough information for you to know that hail roof damage has likely occurred. 


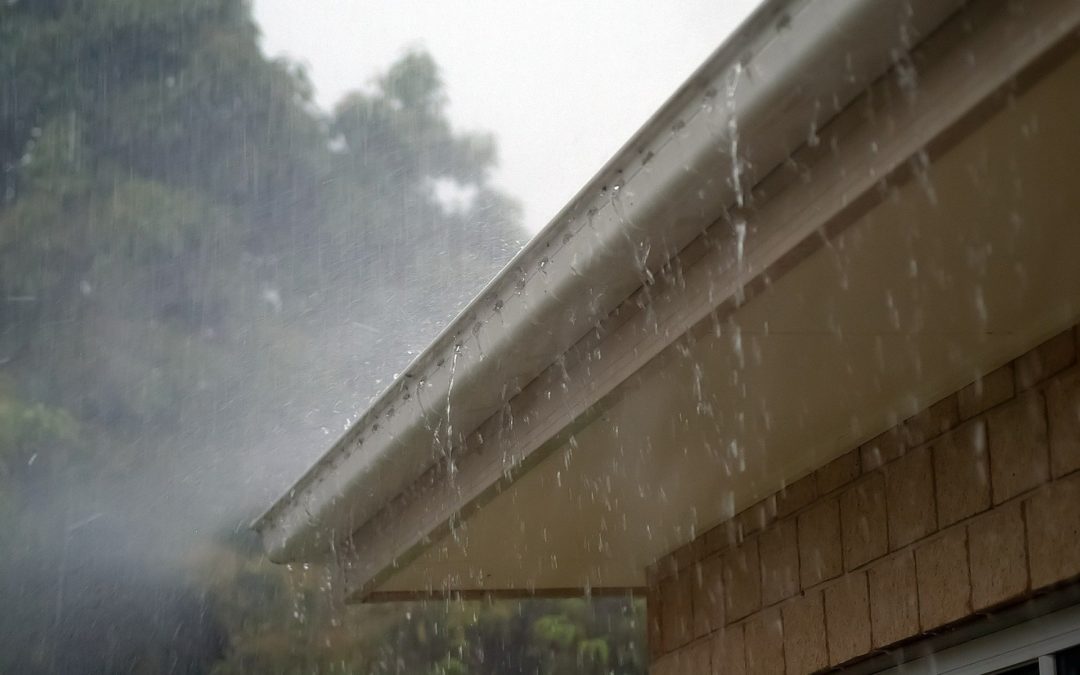
Check your siding, gutters, downspouts, deck, and fence for dents or small holes. These are tell-tale signs that your roof has probably endured similar issues. There may also be bits of roofing material that have littered your landscaping. Not a good look, nor a good sign!


Take a Look Up Top

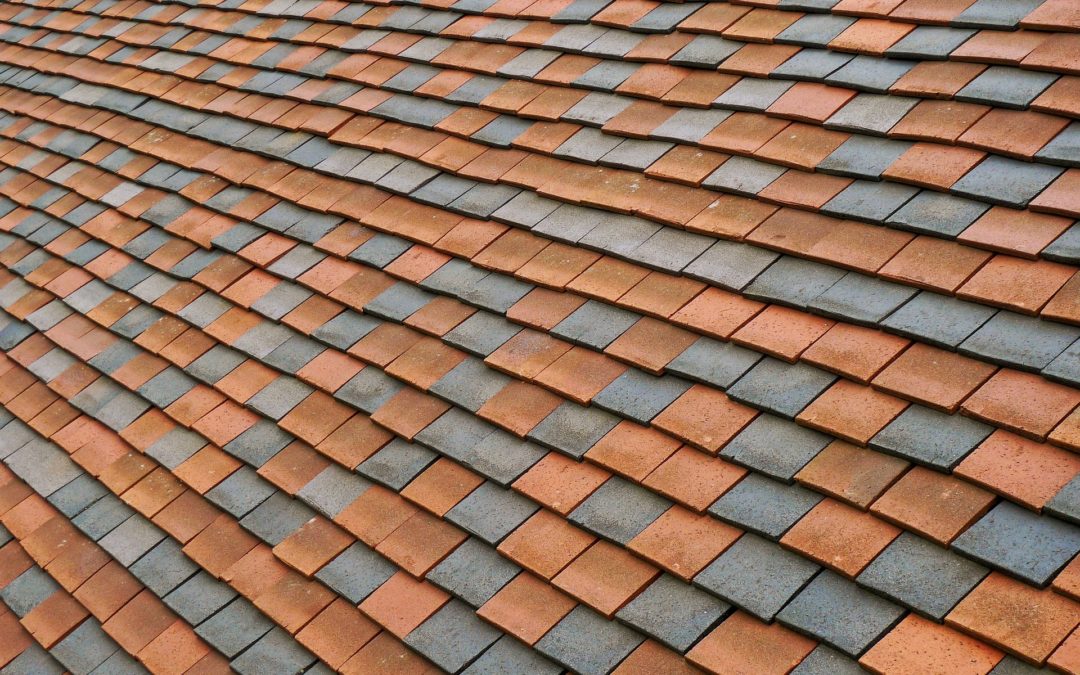
After the storm is over and things dry out, you can get on your roof for a closer look. Typically hail damage is random and in no particular pattern, so it’s important to look over all areas of your roof for these signs:


  • Loss of granules around impact spots
  • Dark hit marks
  • Soft or bruised patches
  • Cracks or tears 
  • Dents or holes


There is a catch, however. Hail roof damage is not always obvious and what may seem like only a bit of surface damage can go a lot deeper than you think, causing more headaches and bills later down the road. 


Should hail roof damage be ignored? Hail no!


Even just some granule loss weakens the integrity of your shingles, which can lead to leaks and a reduced lifespan of your roof. In other words, even minor hail damage can result in major issues, so if you think there’s a chance you have damage following a storm, even if you can’t spot the signs with the naked eye, it’s best to get it checked out by professionals right away.

Repairing Hail Roof Damage


Hail roof damage repair can mean anything from replacing a few shingles to replacing your entire roof! It all depends on the amount of destruction Mother Nature has left behind. 


If it’s just a handful of shingles that need replacing and you’re known as being kind of handy, you might be able to make the repairs on your own. On the other hand, if handy is not exactly an adjective most would use to describe you, well then, by all means, call in the pros. 


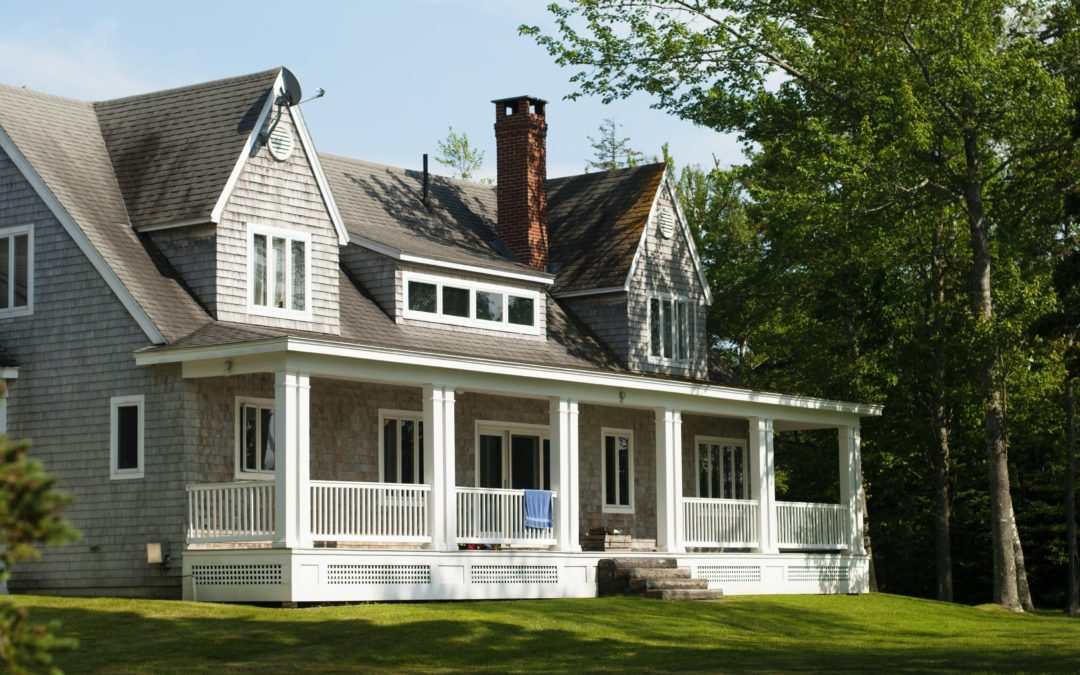
Whether your roof has asphalt shingles, wood shakes, or is made of metal (yes, metal roofs can incur hail damage, too), you can count on Werner Roofing to help! If your roof recently suffered damage from hail or a storm, we’ll be happy to come out, assess, and address hail roof damage before it compromises your roof or your home. Just contact our expert team online or call us at 616-844-5382 today.

roofing contractor

OUR FREE ROOF INSPECTION

How do you know when it’s time for a new roof? The only way to be sure of your residential roof’s current condition is to have a licensed professional personally inspect it. Werner Roofing is proud to offer free roof inspections for every client, so you can be sure of your roof’s condition. Every Werner Roofing inspection comes complete with our promise: “We won’t recommend or sell a roof replacement unless it’s necessary.” 

Understanding Roofing Layers

Understanding Roofing Layers

In Michigan, we know all about layering up to protect ourselves from the ever-changing weather, right? Well, just like wearing long underwear beneath a shirt that’s beneath a jacket, your roof has layers to protect your house from the elements, too! That’s right, you don’t just slap on some shingles and call it good. There are, in fact, multiple layers of protection involved in roofing that work together to keep you warm, safe, and dry. Here’s all you need to know:

Roofing Layer #1: Insulation

Between your attic and your roof lies a layer of insulation that serves to keep the outside air out and the comfortable air in. Proper insulation is vital to energy efficiency — kind of like long underwear! 

Roofing Layer #2: Ventilation

Proper ventilation is key for warm, moist air to escape your attic so it doesn’t mess with airflow or invite mold inside your home. You need this layer for good air circulation and to regulate temperatures and moisture levels, which will in turn keep both energy bills and mildew from growing.

Roofing Layer #3: Framing

This is the foundation of your roof and is designed to distribute the weight of your roof evenly. It’s made up of triangular trusses which give your roof its shape and all the support it needs.  

Roofing Layer #4: Roof Deck

Also known as sheathing, the roof deck is typically made of plywood and is installed over your framing to connect the trusses and joints as well as provide a base and solid surface for the rest of the layers that come next. 

Roofing Layer #5: Water Shield

This layer adheres to the roof deck to protect it from water damage caused by driving rain or melting ice and snow. It’s like a rain jacket for your roof! 

Roofing Layer #6: Underlayment

The underlayment is an extra layer of water resistance between the deck and the shingles. It helps prevent water from getting under shingles and protects the deck even further from possible damage. It’s like wearing a raincoat and using an umbrella.

Roofing Layer #7: Starter Strip

A starting layer of shingles lines the edge of the roof, sealing all of the edges to reinforce your roof against strong winds and storms.

Roofing Layer #8: Shingles

Finally, you’re ready for the shingles! This final layer of your roof is more than just a pretty face for curb appeal. Shingles provide protection from fire, sun, water, and all sorts of weather conditions. It’s like a fancy coat that looks great but also keeps you comfy and warm!  

Roofing Layer #9: Flashing

Well, it’s sort of a layer. Flashing doesn’t cover your whole roof but offers an added layer of thin metal just in certain spots that could use a little extra protection. It acts as a watertight seal around chimneys, vents, skylights, valleys, eaves, and intersections of the roof.

 And there you have it. Who knew there were so many layers to a roof? Well, actually we did since we have more than 30 years of experience under our roofing belts! That’s important, too, since it’s crucial for each layer of a roof to be installed properly to give you the best, longest-lasting protection. 

 When every layer counts, you want to count on a reputable roofing company, and guess what? You can count on Werner Roofing! Reach out to our expert team today for a free inspection or estimate. 


roofing contractor

OUR FREE ROOF INSPECTION

How do you know when it’s time for a new roof? The only way to be sure of your residential roof’s current condition is to have a licensed professional personally inspect it. Werner Roofing is proud to offer free roof inspections for every client, so you can be sure of your roof’s condition. Every Werner Roofing inspection comes complete with our promise: “We won’t recommend or sell a roof replacement unless it’s necessary.” 

What’s the Best Roofing Shingle Color to Use On Your Home?

What’s the Best Roofing Shingle Color to Use On Your Home?

Curb appeal isn’t just about your landscaping and front door aesthetics. If you want a house that really makes people stop and stare, every detail counts right down to the shade of your shingles. In fact, the color of your shingles not only contributes to but actually makes a huge difference in the appearance of your home (not to mention the envy level of your neighbors)! 

Of course, how your house looks isn’t the only thing to consider. Which roofing shingle color you choose can also have an effect on the energy efficiency of your home. Bottom line? Choose wisely, my friends. Don’t take shingle color selection lightly. It might seem like small beans, but it’s actually a big decision, which is why we’re here to help.

How to Select a Roofing Shingle Color


So how do you go about selecting the best shingle color for your home? Here are 3 easy steps you should take to feel confident with your roofing shingle color decision:  

Step 1: Get Some Roofing Shingle Color Samples

The first step is to obtain some shingle samples from your roofing company. There are different brands and styles of shingles, as well as colors, so once you narrow down your list of options, get a sample of each type in a variety of shades so you can bring them home and compare.

Step 2: View Your Color Samples at Different Times of the Day

It’s important to take into account the different lighting that occurs throughout each day and how that can affect the look of your shingles, and thus the overall look of your home. Take your samples out in the morning, mid-day, and evening and walk around your house to see how the different colors look in different lighting and on different sides of your home. Don’t worry if your neighbors are wondering what the heck you’re doing, just concentrate on implementing your shingle-envy plan.   


Step 3: Consider the Style and Color of Your Home

When choosing roofing shingle color, it’s essential to coordinate with not only the color of your siding but also the style of your home and the structure of your roof. 


  • Make sure the shingle color you choose complements the color palette you’ve got or plan to have. For the best results, the shingles should have a slightly contrasting tone to the rest of your house and tie together with your shutters, front door, or accent trim. 
  • Think about how much of your roof is visible. Houses with high-pitched or sloped roofs tend to show a lot of shingle and if that’s the case, you might not want to go too bold or dark with your color choice to keep things looking balanced.
  • Ask yourself what matches best or makes the most sense with the style of your home. For instance, a trendy color might not be the right choice for a turn-of-the-century house. Also, if your roof has features like turrets, gables, dormers or skylights, consider a shingle color that best enhances these unique architectural aspects of your home.  
  • Be careful with shingles featuring blended colors or patterns. While these certainly add character and appeal to solid colored houses, they can look busy and clash with a house that has a mix of siding and brick or stone.

Beyond Beauty: What Else Should You Consider When Choosing Roofing Shingle Color?

Okay, we know you’re excited, but hold on a minute. You’re not quite ready. Now that you’ve followed the 3 easy steps above, there are a few other things you should keep in mind before you make your final decision on your roofing shingle color. 


  • Know your neighborhood – Check if there are any Homeowners Association rules in your neighborhood that could limit the shingle color choices you have. You might also have to weigh a dramatic statement versus resale value of your home. 
  • Keep cool (or warm) and carry on – Your shingle color can actually be a factor in the heating and cooling cost of your home. Just how much can the color of your shingles contribute to your energy efficiency efforts? Believe it or not, it can affect your attic temperature by as much as 40 degrees! So, before you land on a color, consider this:

  • Lighter shades of shingles deflect sunlight and keep your house cool.
  • Dark shingles absorb sunshine and heat, to help your house stay warm. This can also help to melt snow and ice on your roof faster, which you gotta admit is a nice bonus around here! 


Of course, there’s more to energy efficiency than the color of shingles on your roof. Proper insulation keeps your house warm in the winter and cool in the summer by not allowing inside air to escape. Just as importantly, good ventilation keeps air flowing, bringing in cool air and releasing warm air to ensure regulated temperatures. 


You know what else makes a big difference? The quality of roofing materials and the roofing company you choose!  

Finding the Right Color Roofing Shingle For You

Considering your options for new shingles? Call Werner Roofing! We proudly work with and install the best shingle brands on the market and can help you choose the best roofing shingle color and material for your home design, budget, and expectations. We’ll even come and check out your roof for free, so contact us today!

roofing contractor

OUR FREE ROOF INSPECTION

How do you know when it’s time for a new roof? The only way to be sure of your residential roof’s current condition is to have a licensed professional personally inspect it. Werner Roofing is proud to offer free roof inspections for every client, so you can be sure of your roof’s condition. Every Werner Roofing inspection comes complete with our promise: “We won’t recommend or sell a roof replacement unless it’s necessary.” 

5 Common Gutter Problems and How to Fix Them

5 Common Gutter Problems and How to Fix Them

Gutters have a big job to do. They help protect your roof and home by rerouting rainwater away from it. The trouble is, gutter problems can get in the way of accomplishing that important task, and the result can be a whole lot of damage to your roof and house. So, what do you do if your gutters seem to be underperforming? Don’t worry, you’ve got this! Just keep this list handy for an explanation of common gutter problems and how to fix ‘em.   

Problem #1: Clogged Gutters and Downspouts

Perhaps the most common gutter problem of all, clogging occurs when debris accumulates in the gutter and downspouts, blocking the flow of water and causing it to get backed up. This can result in leaks and damage to attic insulation, as well as your home’s foundation.

The weight of all that excess water, along with the sticks and leaves and other debris, can also cause your gutters to sag or even pull away from the house. Obviously, that’s not a good thing either!  

Solution: 

You should clean gutters at least once or twice a year, especially if you have a lot of trees near your home. Check for debris and obstructions following big storms, too. A simple routine of regular maintenance can eliminate this problem, and all the other problems that come with it. Just be warned though: it’s often a messy job, so don’t wear your good clothes!   

Problem #2: Sagging, Damaged, or Loose Gutters

Whether from a storm, a clogging problem, or hardware that has succumbed to the elements and deteriorated over time, sections of gutters can sag or separate from the house and joints can come apart. A saggy, damaged, or loose gutter certainly can’t do its job very well, and may allow water to get in places it shouldn’t. 

Solution: 

Sometimes, the fix for this is as easy as getting yourself some new hardware to reattach the saggy or loose sections or to secure the gutter joints back together. Other times, you may not be so lucky and will need to replace gutters entirely, depending on the damage. 

Here’s a good tip that may help to avoid the problem in the first place: Keep tree limbs cut back to at least three feet from the roof so fallen branches are less likely to cause damage to your gutters, roof, or home. Oh, and don’t forget the solution to problem #1: keep those gutters clean!

Problem #3: Leaking Gutters

If you see a constant drip or steady stream of water coming from a section of your gutter, we’re sorry to tell you, but you’ve got yourself a leak. Your gutters go through some pretty harsh wear and tear, so it’s no wonder they might sport a hole or crack here and there over time. Paint can get old and peel, too, allowing for corrosion to occur, and sealant can eventually wear off around joints or seams. 

Solution: 

Here’s the good news: small holes and cracks can be sealed with a waterproof gutter caulk or sealant, which can also be applied to seams and joints. Plus, there are patching kits for bigger holes that can be found at your local hardware store. Even better? Get yourself some seamless gutters and eliminate this problem once and for all! 

Seamless gutters are exactly that — seamless! They are customized to fit the length of your roofline and because of their design, they have no seams susceptible to leaks. Bam! Problem solved.

Problem #4: Improperly Pitched Gutters

Gravity is your gutter’s best friend, but for it to work its magic, the pitch, or angle, of your gutter has to be just right. Water needs to be able to flow smoothly to the downspout. An improper angle can inhibit the flow and cause pooling or standing water instead, and that invites all sorts of trouble. The proper pitch?  Slope your gutters at a ¼ inch for every 10 feet. And you thought you’d never use math in real life!

Solution: 

Measure and make sure your gutter to downspout is in alignment and sloped correctly. If not, try pushing it into the correct position or taking it down and rehanging it.  

Problem #5: Downspouts Draining Too Close to Foundation

Sometimes you can be so preoccupied with keeping your gutters in tip-top shape that you forget about their trusty companions — the downspouts. Besides checking regularly for clogs, you should also make sure the water dispersing from the runoff end of downspouts isn’t pooling by the foundation or basement wall. That, my friends, could have some major consequences! Believe us, you don’t want to deal with water in your basement or a compromised foundation to your home. 

Solution:

Fortunately, this is easy-peasy to correct. If your downspouts do not extend 4-6 feet from your house, head on back to the hardware store and pick up a gutter extension. This device is inexpensive and easily attaches to the bottom of the downspout so the water is dispersed far enough away to not cause any damage to your house. 

Say Goodbye to Gutter Problems for Good

Gutters giving you trouble? If you don’t want to deal with it yourself, just let Werner Roofing know! We’re happy to help you solve your gutter problems, show you some gutter options, or even install seamless gutters for long-lasting, high-performance stormwater management. Don’t let gutter problems get you down. Use this handy guide or simply give us a call.  

roofing contractor

OUR FREE ROOF INSPECTION

How do you know when it’s time for a new roof? The only way to be sure of your residential roof’s current condition is to have a licensed professional personally inspect it. Werner Roofing is proud to offer free roof inspections for every client, so you can be sure of your roof’s condition. Every Werner Roofing inspection comes complete with our promise: “We won’t recommend or sell a roof replacement unless it’s necessary.” 

New Roof Installation Process

New Roof Installation Process

So you’re getting a new roof, huh? That’s great! But what exactly is involved in the process? Knowing what to expect from a new roof installation can give you peace of mind that you’re receiving the best quality protection for your home. Here’s a look at the process of installing a new roof, step by step. The more you know, the better you’ll feel about your investment. 

Roof Installation Step 1: Deciding on a Contractor and Materials

Yes, you’ve made the big decision to get a new roof, but there are still a couple of important decisions you’ll need to make next. 

First, you’ll need to decide on a roofing company. Ask around for references, collect a few estimates, compare services and warranties (not just price!), and choose the one that best fits your needs.

Then, discuss your material options with the contractor you choose, and decide on the color, style and type of shingle that works and looks best with your house.

Roof Installation Step 2: Removing Old Roofing

As the saying goes, “Out with the old and in with the new!” In most cases, your old shingles will be removed before your new roof can be installed. Your surrounding landscape will need to be protected with tarps and the neighbors will have to excuse the dumpster in your yard, as it will be needed to collect all the old debris.

Once the old shingles are removed, the roofers will be able to inspect the decking beneath and replace any damaged areas with new decking to ensure a solid foundation.

Roof Installation Step 3: Defending Against Water Damage

A non-corrosive metal, called a drip edge, will be secured along the edges of the roof to prevent moisture from building up and getting underneath your new shingles. 

Next, underlayment and flashing will be installed, serving as a waterproofing barrier between decking and shingles and reinforcing roof valleys for extra protection. All vents, pipes, and chimneys will be sealed to ensure no water can penetrate these vulnerable sections of your roof. 

Roof Installation Step 4: Installing New Shingles

Woo-hoo! Now your house is ready to get its new roof. It’s time to apply the new shingles you chose in step 1. How long it takes depends on several factors including the size of your house, the type of shingle you choose, the complexity of your roofline, and of course, the weather. Typically, though, you can expect the placement of new shingles to take anywhere from a day or two, all the way up to a full week. 

Roof Installation Step 5: Cleanup and Final Inspection

After the last shingle is placed, but before you celebrate a job well done, it’s time to clean up all remaining materials, tools, nails, and equipment, so you can say, “Ta-Da! Look at how awesome our house looks!” 

Once it’s cleaned up and looking great, your roofing company will want to make sure your roof functions great, too. A thorough inspection is the final step in new roof installation to ensure standards of quality have been met and your new roof works as good as it looks.

Roof Installation Experts

If you’re considering a new roof for your new home, or you’re ready to replace your roof, reach out to the expert team at Werner Roofing. As a trusted source with years of experience, you can rest assured you’ll receive the best quality roof for your investment. Contact us for a free installation quote and we’ll be happy to come out and help you protect your home for many years to come.


roofing contractor

OUR FREE ROOF INSPECTION

How do you know when it’s time for a new roof? The only way to be sure of your residential roof’s current condition is to have a licensed professional personally inspect it. Werner Roofing is proud to offer free roof inspections for every client, so you can be sure of your roof’s condition. Every Werner Roofing inspection comes complete with our promise: “We won’t recommend or sell a roof replacement unless it’s necessary.”