How to Replace Roof Shingles That are Loose or Missing

How to Replace Roof Shingles That are Loose or Missing

We get our fair share of storms and windy weather around here, and that can certainly take its toll on your house. Walk outside after such an event, and you’ll typically notice tons of fallen branches strewn across your lawn, but here’s a tip: don’t just look down at the ground, look up at your roof! 

Wind and harsh weather can do a number on your shingles, causing them to come loose or even go missing completely. So, what do you do? Well, unless you want more damage to occur, you’re going to have to replace roof shingles that end up casualties of a storm. Don’t worry, though. Just take these steps to ensure your roof is ready for the next big gust of wind.

Step 1: Assess Damaged Roof Shingles

The first thing you should do is decide if this is DIY territory or if you should call in the pros. If there is quite a bit of damage, you don’t have the tools or materials to do a good job, or you just plain don’t like the idea of climbing on your roof, ask professional roofers for help — hey, it’s what we do! 

Besides, it’s often unsafe to repair shingles on your own. Professionals can repair loose or missing shingles quickly and properly, likely saving you money and further hassles in the long run. 

On the other hand, if you do consider yourself handy or we’re talking just one or two shingles that you’re confident you can fix yourself, go ahead and move on to step two. 

Step 2: Gather Materials to Replace Roof Shingles 

Here’s what you need to replace loose or missing shingles safely (you know, besides a ladder, sturdy shoes, and safety gear): 

  • Hammer
  • Pry Bar
  • Roofing Nails
  • Shingle Sealant
  • Replacement Shingles —  did the builder or the previous homeowner leave any leftover shingles behind? If not, head to a home center to find the same type of shingles that match up in color and size. You can grab the other materials you need as well if you don’t have them already handy at home.

Step 3: Repair Roof Shingles – Remove, Replace, Rejoice!

Pick a day that the weather is just right. If it’s too cold, the shingles can crack or break; too hot and the sealant bond between the shingles will be difficult to get apart. Once you’re on your roof safely, clear any debris from the storm. Now you’re ready to replace the roof shingles that are loose or missing.

How to Remove a Loose Shingle

  • Slide your pry bar under the shingle directly above the damaged one and gently lift up until it is free from the sealant. This will expose the first row of nails.
  • Slip the pry bar under the damaged shingle and lift upward. The nails still intact should start to pop up a bit.
  • Remove the pry bar and press down on the shingle so you can pull out the popped-up nails completely.
  • Repeat the procedure on the shingle above to remove whatever is still remaining of the second set of nails. 
  • Pull out the damaged shingle. 

How to Replace a Loose or Missing Shingle

  • Slide the new shingle into place.
  • Lift each of the new shingle’s tabs and apply sealant under each, then press down flat. 
  • Nail into place according to how it was nailed before. 
  • Seal and renail the overlying shingle above it.

Time to Rejoice

You did it! You have officially readied your roof for whatever Mother Nature has in store next. Pat yourself on the back (once you’re on the ground) and give your neighbor a “Yeah, that’s right, I fixed my own roof” kind of nod, then go ahead and celebrate however you like before the wind kicks up again.

Werner Roofing to the Rescue!

If you notice roof damage, it’s best to take care of it quickly before it gets worse, or more expensive to fix!  If you’re not the DIY type or simply feel better knowing professionals are addressing the problems with your roof, contact Werner Roofing today. Our expert roofers are here to help inspect and resolve roofing damage before it causes problems for your home. Just give us a call at 616-844-5382 and we’ll be happy to come out and help.


roofing contractor

OUR FREE ROOF INSPECTION

How do you know when it’s time for a new roof? The only way to be sure of your residential roof’s current condition is to have a licensed professional personally inspect it. Werner Roofing is proud to offer free roof inspections for every client, so you can be sure of your roof’s condition. Every Werner Roofing inspection comes complete with our promise: “We won’t recommend or sell a roof replacement unless it’s necessary.” 

What to do About Winter Roof Leaks?

What to do About Winter Roof Leaks?

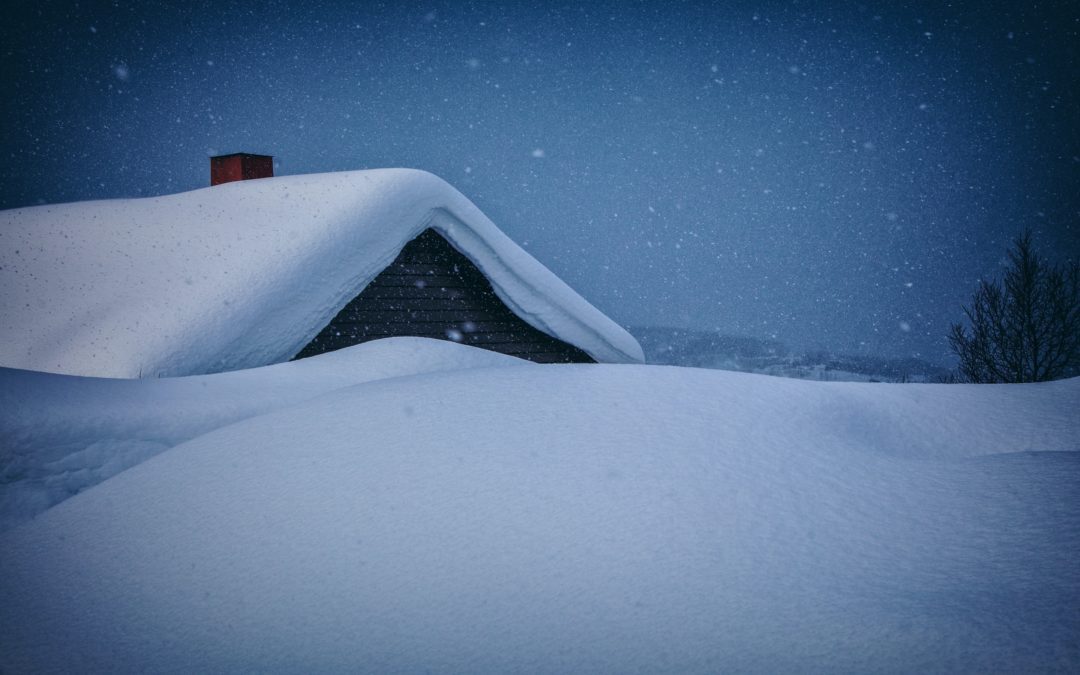
So it’s winter, and your roof is leaking. What do you do? While there may be some repairs that have to wait until spring, some winter roof leaks need to be repaired as soon as possible.

Here are some common problems that could be causing a winter roof leak and what to do about it.

Causes of Winter Roof Leaks

Winter roof leaks can be a serious problem. A few of the common culprits are ice dams, clogged gutters, condensation, and damaged shingles.

Ice Dams

Ice dams occur when snow melts and travels down the slope of your roof, then cools and refreezes at the eaves, creating thick ridges of ice. These ridges block water and snow from moving off your roof, which then refreeze as a new layer. Eventually, water can travel backwards underneath your roof’s shingles, where it can enter your home as a leak. If ice dams aren’t removed, they can cause serious damage to your roof and home’s structure.

Clogged Gutters

If your gutters become blocked with ice, leaves, or dirt, then they can’t effectively drain water, ice, and snow away from your roof. Similar to ice dams, clogged gutters can cause water to back up and seep under your shingles, and cause your roof to start leaking in winter.

Attic Condensation

When warm, humid air from your home rises in the winter, it reaches the attic and cools, creating condensation. If too much condensation forms, it can have serious consequences for the health of your roof and even cause winter roof leaks. Excess water in your attic from condensation can also cause mildew, mold, or rot.

Damaged Shingles

Cracked, damaged or missing shingles can also be a cause of winter roof leaks. If your roof was damaged in a storm due to high winds, hail, or a falling tree branch, it could have removed shingles and left your roof deck exposed to water. For this reason, it’s important to inspect your roof after a storm, and make sure the shingles are secure before winter weather sets in.

What to Do if Your Roof is Leaking in Winter

If you notice your roof leaking in winter, what can you do? The key is to identify the problem early, then call a professional to repair it, or offer you a temporary solution and schedule the repair for spring.

Catch Winter Roof Leaks Early

The key to resolving problems with your roof is identifying them quickly, before they cause more damage. In winter, it’s especially important to spot leaks early. Signs of winter roof leaks include water stains on interior or exterior walls, water dripping from the ceiling or through ventilating fans, and condensation on skylights. These are all indicators that something is going on with your roof, causing it to leak or become susceptible to leaks. 

Call a Professional

If you notice any sign your roof is leaking in winter, it’s best to call a professional roofer to inspect the damage and recommend the best course of action. If the fix involves working on your roof, serious repairs will likely have to wait until spring, when it’s safer for the roofer and your roof. 

Find a Temporary Solution

Your roofer may be able to suggest a short term solution or perform a temporary repair until they can return with a crew to fix the problem for good. For example, ice dams might indicate that your roof needs additional ventilation and insulation to prevent recurring leaks. While they may not be able to get onto your roof until spring, they can remove existing ice dams and use fans to help regulate the temperature in your attic.

Have you discovered a leak in your roof this winter? Don’t worry — Werner Roofing can help. Give us a call to talk to one of our roofing experts today.

roofing contractor

OUR FREE ROOF INSPECTION

How do you know when it’s time for a new roof? The only way to be sure of your residential roof’s current condition is to have a licensed professional personally inspect it. Werner Roofing is proud to offer free roof inspections for every client, so you can be sure of your roof’s condition. Every Werner Roofing inspection comes complete with our promise: “We won’t recommend or sell a roof replacement unless it’s necessary.” 
What is Roof Alligatoring, and What Does It Mean for your Flat Roof?

What is Roof Alligatoring, and What Does It Mean for your Flat Roof?

Commercial roofs require much different repair and maintenance routines than residential roofs. For starters, most commercial roofs are flat. This means they react much differently to sun and precipitation and often require more frequent maintenance to ensure they function as they should. One common problem with many flat commercial roofs is roof alligatoring. 

What is Roof Alligatoring? 

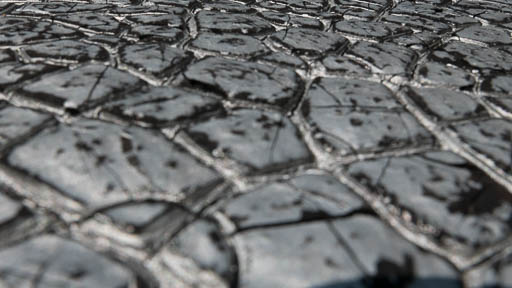
Roof alligatoring is a phenomenon that occurs as a flat roof ages. In general, it’s caused by the sun. The bright UV rays eventually dry out the membrane or coating that tops your flat roof, causing it to crack. The older your roof gets, and the longer you leave alligatoring to its own devices, the worse it will get. Extreme temperature changes, from sunlight, snow, and even internal heating and cooling will cause new cracks to appear and will make existing cracks worse. 

Can You Fix It?

In general, roof alligatoring is a sign that your roof is aging. That said, it is possible to prevent alligatoring, and to repair small patches before they get so bad that you have to replace your flat roof prematurely. Here’s what you need to know to prevent or repair alligatoring, plus a few tips on how to tell that alligatoring has gone too far. 

Prevention

It is possible to prevent roof alligatoring by scheduling regular inspections and keeping up on maintenance. Flat roofs require a bit more upkeep than sloped, residential roofs, and it’s important to keep up on that maintenance if you want to extend the life of your roof. Regular inspections will help ensure you’re able to tackle any small alligatoring problems before they become larger, and your roofing professional can apply a UV protectant or reflective roof coating on a consistent schedule to prevent alligatoring and other damage from happening. 

Repair

If you’ve noticed small splits and cracks in your roof, it’s best to remove and patch the problem area. Some small hairline cracks can be filled by applying an appropriately rated energy sealing polyurethane, but in general, it’s best to just get rid of those troublesome sections as they appear. 


Signs that Roof Alligatoring Has Gone Too Far

At some point, roof alligatoring can become a cause for replacement. If not taken care of quickly, cracks can continue to split down through the roofing material where they will eventually cause water damage. At this point, it’s better to simply replace the roof, rather than do a number of costly and extensive repairs. Here are a few signs that alligatoring has advanced to the point that you should replace your commercial roof:


  • Water is seeping into your building. If you’re noticing any kind of water damage due to the cracks in your roof, it’s time for a replacement. 
  • Alligatoring has spread across the roof. Roof alligatoring usually starts in one spot, and then gradually expands as cracks widen and extend. If you’re noticing that alligator pattern across your entire flat roof, it’s time for a replacement. 
  • Your roofer recommends a replacement. If your roofer is out for a routine inspection and recommends it might be time to replace your roof, don’t wait. The longer it takes you to get that roof replaced, the harder (and more expensive) the job will be. 


Roof alligatoring is a difficult and common problem with flat commercial roofs, but there are ways to prevent it from shortening the life of your roof. If your flat roof is showing signs of alligatoring, Werner Roofing would love to help. We install and repair commercial and residential roofs throughout West Michigan, and would be happy to take a look at your flat roof problems. Give our office a call at 616-844-5382 or contact us online for a free estimate for roof alligatoring repair. 


Curled Shingles — Repair or Replace?

Curled Shingles — Repair or Replace?

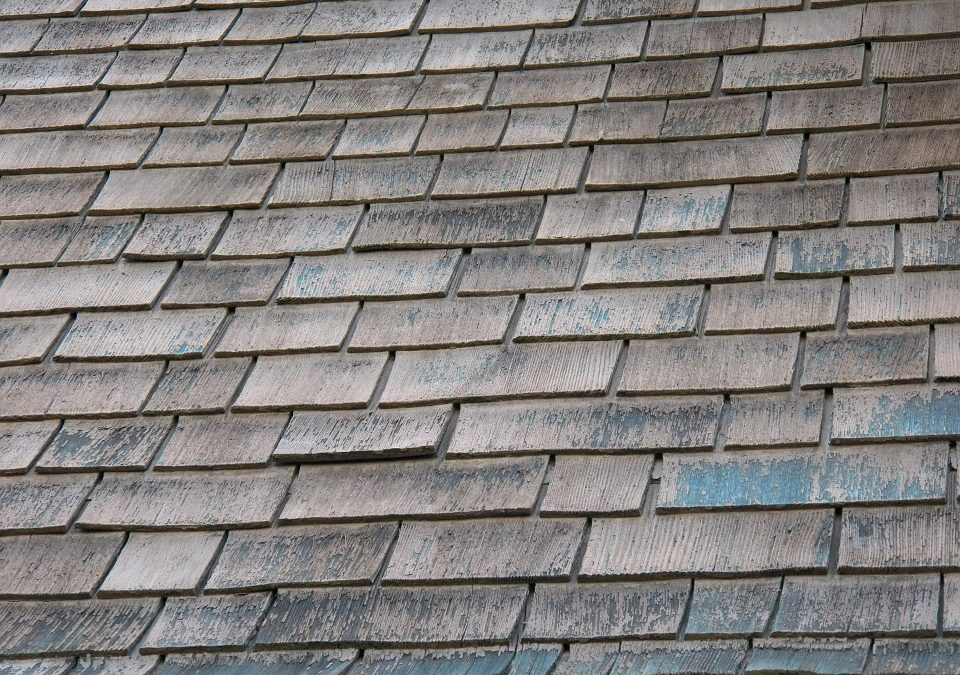
There are a number of reasons shingles start to curl. Whether they’re just getting older, or you’re having trouble with attic ventilation, it’s not uncommon for some shingles to start to curl. But what do you do about them? Is it possible to repair some of those shingles, or do you really need to get them all replaced? Here’s what you need to know about addressing curled shingles: 


Can I Repair Curled Shingles?


Let’s start with what seems like the easiest approach — a simple repair. 

Yes, you can repair some instances of curled shingles, especially if you only have a few shingles that are showing problems.

It’s important to remember, though, that curled shingles are usually a sign of a greater problem. It could be that your roof is reaching the end of its life. It could also be that your roof isn’t properly ventilated, or even that your shingles weren’t properly installed in the first place. 

So, even if you do choose to repair curled shingles, know that it’s just a temporary fix. In the long term, you’ll want a professional to come out and inspect your roof, and let you know what the problem is, and if it’s time to have a new roof installed. 

How Do You Repair Curled Shingles?


If you’re only looking at a few curled shingles, you can make a few temporary repairs. There are two main ways to repair curled shingles, but they’ll only work if the curled shingles are still intact, and haven’t cracked or disintegrated. If your curled shingles are in decent shape, they’ve just curled up or down, you or your roofer should be able to make temporary repairs fairly easily. The process goes something like this: 

    • Gather supplies. You or your roofer will need a ladder to get on the roof, a hammer, roofing nails, and roofing mastic or sealant. 
  • Gently lift the curled shingle. You need to lift the shingle gently, so you or your roofer can apply a layer of the roofing mastic under the shingle. If you’re making the repair yourself, be careful not to apply roofing mastic to exposed portions of roofing. 
  • Tack down the shingle. If necessary, gently tack a roofing nail on each of the curled corners of the shingle. 
  • Apply brick or rock. If you’re not using roofing nails, just use a brick or a heavy rock to weigh down the curled shingle for about 24 hours. Once the roofing cement has solidified, you can remove the brick. 


This repair procedure is great if you’ve only noticed a few curling shingles. Making repairs as soon as you notice these problem shingles is the way to go, as you can avoid any larger problems, like leaks or water damage. If you notice a large patch of shingles curling, it might be time for a replacement. 

Replacing Curled Shingles

If a significant number of your shingles are curling, or if they’re curling so badly that your roofer won’t be able to flatten them back out, they’ll need to be replaced. In some situations, it is possible to replace just a few shingles but remember: if a lot of your shingles are curling, there’s likely a larger issue at play. 

In this situation, it’s in your best interest to talk to your local roofer. At the very least, they can inspect the roof safely, and let you know what’s going wrong. In most cases where a significant number of your shingles have curled, it’s likely time for a new roof. If only a small section of your roof is experiencing problems, your roofer may be able to do a repair rather than a full replacement, but it’s still important to get an expert opinion before moving forward. 


Do you have curling shingles? Werner Roofing can help! Give us a call at 616-844-5382 or contact us online for a free, no-obligation quote for curled shingle repair or replacement, 


How Roof Slope Affects Your Roofing Cost

How Roof Slope Affects Your Roofing Cost

There are many factors that go into the cost of roof installation or roof repair. If you’re new to homeownership, or if this is your first time hiring someone to take a look at your roof, you might be wondering about some of the key aspects of your roof that can affect the cost of your job. One key consideration that your roofer will have to factor into your roof repair or installation is the slope of your roof. Here’s what you need to know:

What is Roof Slope, and How Do We Talk About It?

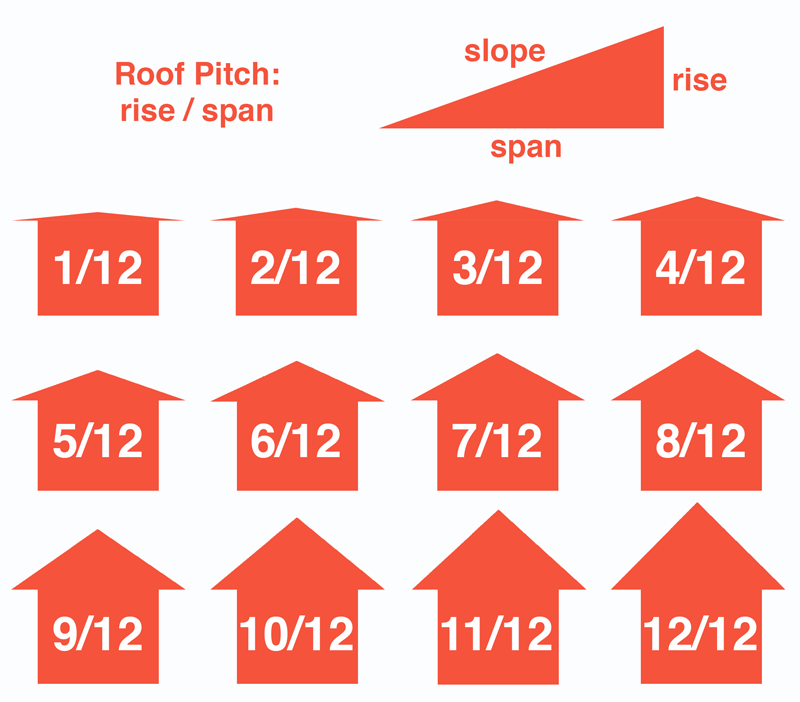
A roof’s slope, or pitch, refers to how steep it is. Roofers calculate roof slope by looking at how much height a roof gains in a set horizontal measurement. This is represented by a fraction. Most often you’ll see numbers like 3/12 or 6/12. 

The first number represents how many inches the roof rises vertically. The second number refers to the span of the roof or the horizontal distance it takes for the roof to rise. Take a look at this diagram for a visual example:

houses and roof pitch

Photo cred: Photo Courtesy of InchCalculator.com

Most often, roof slope is measured with the second number as 12, because that represents one foot. So, a roof with a 6/12 slope would rise 6 inches for every horizontal foot from the gutters to the roof’s peak. 

Why Are There So Many Roof Slopes?

Nearly every home has a different roof slope. For some, it’s an architectural style, but the slope of a roof does actually serve a function. The steeper your roof, the easier it will be for precipitation like rain and snow to slide off. That’s why you’ll often see homes with steeper roofs in areas like the Midwest and Northeast where it snows a lot, and flatter roofs in the Southwest, where they don’t deal with much precipitation. 

Examples of Home Styles with High and Low Roof Slope

Since there are so many different types of roof slopes, it might be helpful to picture the difference between a low and high roof slope. For example:

    • A High Roof Slope is commonly seen in classic New England home styles, like Colonials and Victorians. They have tall, steep roofs that make them seem dramatic. This isn’t by coincidence, either. Most homes in New England face a great deal of snow in the winter, so their steep roof slopes look good with their home-style, but they also serve the purpose of shedding all of that snow. 
    • A Low Roof Slope is common in home styles that became popular in the 50s and 60s because a low sloped roof is much easier to build. Craftsman homes and traditional ranches feature lower roof slopes. 


Why Do Steep-Sloped Roofs Cost More?

If you’re looking into building a new home, or if it’s time for a new roof on your existing house, and you’re wondering how much the project will cost you, it’s good to know that homes with very steep roof slopes will cost a bit more. For reference, most residential homes feature roofs with a slope of 3/12 to 8/12. Anything taller than that is considered steep and could cost a bit more for you to repair or reroof. Here’s why:

It’s Not Walkable

Roofs with a steep slope aren’t walkable. That means your roofer’s crew can’t easily stand on the roof and walk around to install new shingles without fear of falling off. Roofs that aren’t walkable require that roofers take additional care when moving about, which adds time onto your project. Since roofers bill by labor hour, this can add a bit to the cost of your roof repair. 

Additional Safety Equipment

Roofers working on steep roofs require additional safety equipment, again because they can’t easily walk on your roof. Depending on how steep your roof is, roofing crews might need scaffolding or rigging to make sure all workers are safe while they’re completing your roof repair. This equipment takes time to set up, and money to rent or purchase, so your roofing quote will reflect that. 

Different Installation Techniques

Steeper roofs require different installation techniques. Roofs that are fairly flat can be installed easily, with a minimal amount of nails in each shingle. Roofs that are steeper require a bit of extra work to ensure your shingles stay on in the face of that steep roof slope. Often, roofers have to use more nails per shingle, work with a different material, or install a unique roofing underlayment to comply with your area’s building codes and to make sure that your roof is doing its job. Since these techniques are outside of the normal scope of a roofing job, you may have to pay a bit more to have your roof or roof repair completed. 

Competition

Roofs with a steep slope take more work and a more experienced crew. Not all roofers have the crew and the tools necessary to complete work on a very steeply sloped roof. That means there’s less competition for the roofers who can complete that work, and they’re able to set their prices a bit more freely. If you have a roof with a steep slope, it’s always good to get bids from multiple roofers and make sure that the roofer you’re talking to has experience roofing homes with a steep roof slope. Don’t just take the lowest bid — make sure you’ve done your homework, and find a roofer you can trust to do the job right. 

In the end, repairing or installing a roof with a steep slope could cost a bit more money, and take a little extra time. That said, you should be able to find a roofer who can work with you to find the best solution for your home, your roof, and your budget. Whether you’re building a new home and need a roof, or you’re worried about the slope of your roof affecting upcoming repairs, give the experts at Werner Roofing a call. We’re happy to help, regardless of the slope of your roof, and we always offer a free inspection before we start any work.

What To Do About Skylight Leaks

What To Do About Skylight Leaks

Many homeowners love the look of skylights —  they let in plenty of natural light, even during the darker months, and they go a long way to bring nature into your home. That said, homeowners are also wary of skylights, because of the reputation they have for developing costly roofing leaks. 

Here at Werner Roofing, we install quite a few skylights a year, and we’re happy to say that when installed and maintained properly, a skylight can last you just as long as the roof itself. But, if you’ve recently moved into an older home, or if your roof and skylights are getting a little bit older, you still might experience a leak or two. If you do, here’s how to take action to keep your roof, your home, and your family safe:

First, Rule Out Condensation

If you suspect your skylight is leaking, first take a good look at the leak, and observe exactly when you’re noticing the leak happen. Is it just when it’s raining or snowing, or do you notice it happening a lot in the winter, too? 

Sometimes, a skylight that’s been poorly insulated will collect condensation due to the differing temperatures between your house and the cold or humid outdoors. If condensation is the problem, and not a true leak, you probably don’t need to call a roofer. Instead, you’ll need to install more insulation around the skylight on the interior, ceiling side. 

Inspect the Source of the Leak

Once you’ve ruled out condensation, it’s time to figure out where the leak is really coming from. In general, there are two major culprits:

There’s a leak between the glass and the skylight frame

If water seems to be seeping through between the glass of the skylight and the skylight window frame, then your roof probably isn’t the problem. This is more likely due to the age of the skylight itself. As skylights age, sometimes their weather seals dry out and crack, and over time general wear and tear can cause them to pull away from the glass. 

If this seems like the type of leak you have, you might try caulking around the glass with clear, silicone caulk. It’s good to know that you should try and wait for a very dry day when there’s no water in the window. When water becomes trapped in between the panes of glass and the weather seal, your skylight could look permanently foggy because of the moisture that’s stuck in there. 

If water does become trapped in the skylight following your caulking attempt, the only way to fix the fog is to replace the skylight. 

There’s a leak between the skylight frame and the roof

If you’re noticing water seems to be leaking from your skylight, but the ceiling around it is a little damp too, then you’re probably looking at a leak that is the fault of the roof. Most of the time, these leaks happen when the flashing on the skylight and the roof around the skylight wear out, but they can also happen if the skylight was improperly installed. 

In this case, your best bet is to call a roofer. Leaks like this are more serious because if they’re left unchecked they can grow to affect other parts of your roof. 

That said, a skylight leak on the roof side is a fairly easy fix, especially if the flashing is to blame. When you call a reputable local roofer that you trust, they’ll come out to make an inspection, and let you know for certain what’s happening. If the flashing is to blame, they’ll tear off the existing flashing, and install new around the skylight. 

If the skylight itself was poorly installed, the repair might take a little bit more work, but your roofer should be able to make the necessary adjustments to stop the leak. 

In the end, nearly all skylight leaks are fixable, and most of them aren’t a big problem unless you wait far too long to address them. If you notice a skylight leaking, it’s always better to take action right away, rather than wait for the leak to get worse. 

Do you have a leaking skylight? If you’re noticing a drip that you’re not sure how to fix, Werner Roofing is happy to help. Give us a call at 616-844-5382 or contact us online for your free estimate today.